It is sometimes best to first align your object with the eyepiece. Slew to your target object and use the handpaddle to center your object as close to the center of the eyepiece as possible. You can use a reticle if necessary. The importance of this step cannot be emphasized enough!
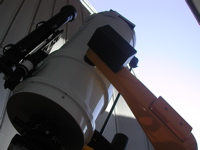
Now, remove the eyepiece and securely mount the spectrograph through the eyepiece port. Try not to bump the telescope. Alignment is crucial!
Adjust the micrometer on the bottom of the spectrograph to the central wavelength desired.
[Note: 540 on the micrometer corresponds to a central wavelength of ~ 570 nm]
Make small movements to apply offset to the above wavelength until you see desired lines
In CCDOps, click Camera -> setup and make sure Active CCD is set to Tracking
On the bottom of the spectraph, turn on the red LED light to illuminate the slit.
Click Camera -> Grab to take a image of the tracking CCD. Take a short (~ few seconds) exposure to see if your object is in the FOV. You should see an image pop up with a vertical line (the slit) and hopefully your object in the FOV. The goal is to get the object centered on the slit.
To center the object on the slit, goto the TCS window.
Click Telescope -> Movement -> Offset/Zenith and enter RA and DEC offsets in arcsec.
Enter - RA to move object left
Enter + RA to move object right
Enter - DEC to move object up
Enter + DEC to move object down
Enter small offsets (15"-30") in one direction, then hit Apply and Start Slew.
Grab another exposure and repeat process until your target object is centered on the slit.
Taking Spectra
Be sure that the red LED light on the bottom of the spectrograph is OFF.
In CCDOps, click Camera -> setup and make sure the Active CCD is set to Imaging
Click Camera -> Grab and enter exposure time. Make sure that Darks are turn ON.
Generally targets should be ~20,000-30,000 counts. 65,000 counts is saturation level.