|
Harvard University
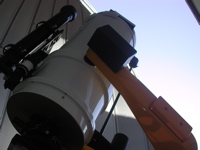
Astronomy Lab and Clay Telescope
|
|
Day Labs | Evening Labs | Cloudy Day Labs | MaximDL Help
Exploring Kirchoff's Laws
SPU-21 Fall 2014
printer version
Kirchoff's laws state that when a cool gas lies in front of an opaque hotter object, the cool gas will absorb more light from the hot object than it emits by itself, so an absorption line spectrum results. The lines appear at wavelengths where atoms in the overlying cool gas can absorb light of that energy to undergo an electron transition to a higher energy level (as discussed in class). The relatively cool solar "atmosphere", overlaying the hotter surface layers (photosphere) of the Sun, is a perfect example. But if the gas is hotter than the background source, the gas emits more light at its favored atomic transition (or lin) wavelengths than it absorbs, so an emission line (i.e. a line that has greater intensity than the neighboring "continuum") results.
What you need:
- 200-watt lightbulb
- Alcohol lamp
- Matches
- Baking soda
- Variac (to vary the voltage of the lightbulb)
- Adjustable stand for the lamp
- Sodium lamp
Procedure:
- Getting set up!
- Close all the blinds. Turn off the lights and shut the door. We want the lab to be as dark as possible.
- Turn on the sodium lamp in front of the slit. Hold the eyepiece lens where it is marked NaD lines on the spectrograph. You should see two bright orange lines when you look through the eyepiece. These are emission lines. Now you can remove the lamp. This was just used to visually center the lines.
- Now, place the alcohol lamp on the stand so the flame is aligned with the spectrograph slit. Place the lightbulb, on a stand, directly behind the alcohol lamp and plug it in to the variac which will simply vary the voltage.
- With the eyepiece lens at the marked sodium lines on the spectrograph, turn the lightbulb all the way up and observe the continuum spectrum.
- With the alcohol lamp lit, sprinkle a tiny (!) bit of baking soda on the buring flame while your classmate observes an absorption line. NOTE: watch that your observer-companion's hair is not near the flame!
- Now that we know what an emission line and an absorption line look like, we want to measure the voltage where the NaD lines switch from emission to absorption. You should note when the lines just disappear, as this will be when the temperature of the lightbulb filament should be about the same as the temperature of the flame.
- Start with the lightbulb off. While one person is continuously sprinkling a tiny amount of baking soda over the flame, the second person is varying the voltage in small increments (of, say 10V to start and 5V as you get close to the transition point), the third person is looking through the eyepiece for the transition point. Write down the voltage in the table (pdf or docx). You may need to go past the point of transition and then back down to find where you think the lines really disappear. It is a subtle measurement.
- Take multiple measurements. Try starting with the lightbulb off and increasing voltage and then start with the lightbulb fully on and decrease the voltage. Make sure your group members switch tasks each time you take a new measurement.
Analysis:
- Figure 1 is a graph showing the temperature of a tungsten filament as a function of the applied voltage.
- Determine the temperature of the alcohol flame and estimate the range of uncertainty for your measurement.